 From the first time I pulled apart my parents computer, back in 9th grade (1999), I discovered an insatiable curiosity around how computers work and how to fix them when something goes wrong. Fortunately for my parents (or me?), nothing went wrong that day.
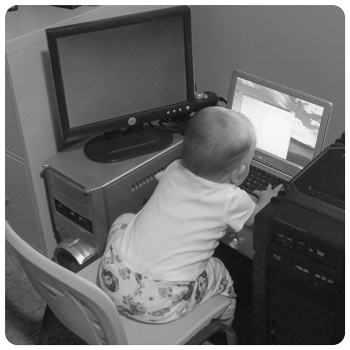
That same curiosity has continued to the present day, which is great because now I can actually afford to do something about it. Coincidentally, my daughter seems to share at least some form of this curiosity, as she hunkers down and starts hitting buttons and making windows pop open that I've never seen before. She seems to know what she's doing. Her primary focus is in breaking things in a manner that I can't easily fix - like breaking keys off of my old laptop. I guess she hasn't grasped the part about 'fixing' yet. I digress. Some of my primary hobbies continue to be computers, networking, programming and other tinkering-hobbies that start with a line of coke... I mean code.
Along the way I've noted some of the more frustrating errors that have popped up on my screen or under the hood, wherein I had to delve deep to find the solutions mixed into the melting pot of the indexed internets. To follow are a few of the known knowns and the known unknowns, while omitting a few of the unknown knowns and unknowns.

CoreTemp
Monitor processor temperature and other vital information. It is capable of displaying the a temperature of each individual core of every processor in a system.

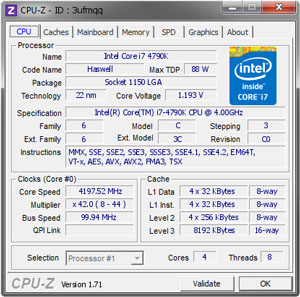
CPU-Z
Gathers information on some of the main devices in your system:
- Processor name and number, codename, process, package, cache levels
- Mainboard and chipset
- Memory type, size, timings, module specifications
- Real time measurement of each core's internal frequency, memory frequency
Open Hardware Monitor
Monitor temperature sensors, fan speeds, voltages, load and clock speeds of a computer.
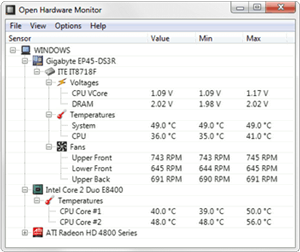
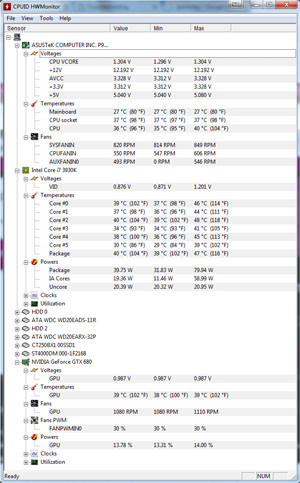
HWMonitor
Similar to Open Hardware Monitor, this is a hardware monitoring program that reads PC systems main health sensors: voltage, temperatures, fans speed.
My first PC build recently went belly up. This is a machine that I built in 2006 when I was first going to college, so at this point it's had nearly 10½ years of service under my hands. All those years ago this was a machine built with one purpose in mind - gaming performance, and it delivered. The specs are laughable now, but 10 years ago 2GB of RAM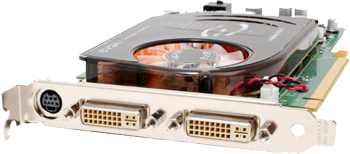 set you back $300! For that machine I spent $300 on the GPU (EVGA 7950GT 512MB GDDR3 [262 passmark]), $333 on the processor (Intel Core 2 Duo E6600, 2.4GHz [1556 Passmark]) and another $300 on the RAM (2x1GB DDR2 800 PC2 6400). Those three items, just like in any performance build, accounted for 50% of the purchase price, which included two monitors. This isn't to say it was the best machine possible at that point in time, that would have been ludicrous in my mind, but it was easily capable of running anything I threw at it at max settings. I was pleased.
7 years on and the GPU falls apart. Fortunately EVGA is not one to back down from a warranty and so after an hour on the phone with support I had a replacement card on the way. A 7 year old GPU? Yes. This card was no longer running anything but Google Chrome at 60 fps, but that didn't mean I was going to throw it away if it was still operational or at least under warranty (gotta love a lifetime warranty). The replacement card came back and found its way into the now-ancient 2006 Build. Fast forward to 2017 and after a power supply replacement a couple years back, the computer is now failing to start up and CLEARLY not worth the money to replace the parts. It served its purpose sitting out in my workshop, doing Google searches and playing music, but now its clock had indeed expired. What to do with the working parts? Shelve them? Toss them? Salvage them? I decided to go with the latter.
In 2013 I built a new desktop computer with the best components I could reasonably afford. For this build the CPU was Intel's i7-3930K 6-Core 3.2 GHz [12033 passmark] and the GPU was EVGA's GTX 680 FTW+ (4GB GDDR5) [5698 passmark]. This beauty had 4 video outputs, all of which I was determined to take advantage. There is nothing quite 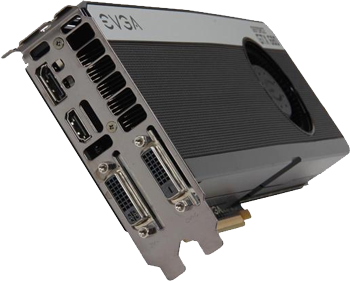 like the splendor of 3 HD screens emitting the soft glow of The Witcher 3: Wild Hunt, in Nvidia's Surround Configuration, with the 4th screen showing whatever the devil else I felt inclined to view.
As with anything, when you give a mouse a cookie (or a video card capable of outputting to 4 monitors) he's going to want a glass of milk (or perhaps another GPU to see what it's like with even more visual stimulation). So, since my old 2006 build was sitting in the workshop gathering dust, I figured it might be interesting to see if it was possible to get two completely unique GPU's to play nice with one another. They're both made by EVGA and both run on Nvidia's architecture, so why shouldn't it work? I started sifting through online forums for similar stories. From a cursory glance, no one had posted any stories that closely matched what I was trying to accomplish. Everyone seemed confused why people would ever want to put two unique GPU's into the same computer, since SLI would never work in that fashion. They seemed to mostly disregard the simple value of having more screens to have more information available simultaneously. I decided to go for it anyway.
Here's the short version: The outcome was a complete load of horse dung.
The unabridged version: After putting the 7950GT into the computer in the neighboring PCI Express slot and hooking up a 5th screen directly to that GPU, the computer started up and the display reverted back to what you'd expect to see when installing a fresh copy of Windows - the low resolution desktop, on a single screen, that results from the lack of updated drivers. No big surprise. I opened up GeForce Experience, expecting the software to recognize the fact that a second GPU was present and lacking a valid driver. This was not the result. GeForce Experience simply showed a notification that the driver was "outdated," but no detail about there being two GPU's present. Okay. With some degree of hesitation I clicked to download the recommended driver and proceeded to install it. This resulted in the driver for the GTX 680 being uninstalled and subsequently replaced with the most up-to-date driver for the 7950GT. Great, now I've got a 10 year old GPU with a good driver sitting next to a 4 year old GPU with no driver. GeForce Experience saw nothing wrong with this and generated no prompt to re-update the driver for the GTX 680. I opened up the device manager in the system settings and (surprise, surprise) there is a exclamation notification tied to an "unknown device" - obviously the 680. Clearly things are not going well. I right click the item and go to update the driver software and Windows fails to find anything relevant and can't proceed. At this point I figure I'll just load the driver manually. From Nvidia's website I downloaded the latest drivers for both GPU's and reboot the computer before running any other software. On reboot Windows loads up again into the low-res desktop and begins to automatically install drivers for the "newly installed device," the GTX 680. I have no idea what driver Windows is actually trying to install, because I'm sure it wasn't the one I had downloaded minutes earlier. Whatever. The driver install finishes and the screens flicker and come back to life, at least the four that are connected to the GTX 680. But now Windows Device Manager is showing an error for the other GPU (the 7950GT), which had just had it's driver successfully installed before restarting! Clearly, Windows has no idea how to handle this situation on its own.
At this point I manually uninstalled both GPU drivers from the Device Manager, rebooted again, let Windows spend a minute automatically installing some driver for whatever it discovered and then one by one manually ran each of the GPU drivers that I had downloaded earlier. Both installed successfully and I rebooted again. Am I surprised to see the low-res desktop again on boot up? No. Once again Windows is having driver conflicts for the two GPU's and fails to accept the fact that two unique pieces of hardware are installed that use two unique video drivers. At this point you get the idea. I made a couple more attempts to force Windows to deal with the problem, but it was never able to reconcile the display environment across these two video cards.
Finally I gave up and pulled the old GPU from the new build and resigned myself to the fact that its only value would be to reside in another desktop all by itself, preferably in a machine that will never be stressed beyond loading Facebook for my wife or a Disney movie for my daughter. My newer computer is back to the way it should be, with one GPU and four screens.
My advice to anyone considering the use of multiple GPU's in a single computer build, whether for extreme gaming or simply lots of displays - use the exact same GPU models and use the SLI connection to bridge them to ensure that Windows and Nvidia don't try to force the two cards to compete with one another behind the curtains.
Lesson learned. Damn card.
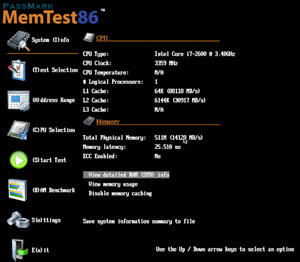
MemTest86
Memory testing software for x86 computers. It boots from a USB flash drive or CD and tests the RAM in your computer for faults.
Windows Memory Diagnostic
The System Recovery Options menu contains several tools, such as Windows Memory Diagnostic, that can help you check your computer for memory hardware errors. This set of tools is on your computer's hard disk and on the Windows installation disc.


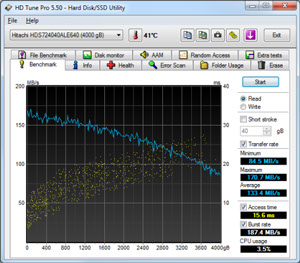
HD Tune
Hard disk / SSD utility with many functions. It can be used to measure the drive's performance, scan for errors, check the health status (S.M.A.R.T.), securely erase all data and much more. (Pro and Free versions available)
External Drive Capacity Understated by Windows
I had an experience today where I had installed a program to run off of a USB drive. The program only took up 48MB. When I was done using the program the computer no longer recognized that this USB drive had 4GB of space, and when reformatting it the computer still wouldn't recognize the full capacity of the drive. I had to follow the instructions on this page to get the drive to be fully wiped clean (delete partitions, including EFI System partitions).
Once the partitions were wiped I had to use the CMD Prompt to also reformat it. Windows Disk Manager still wouldn't follow through when I tried to "create a new simple volume."
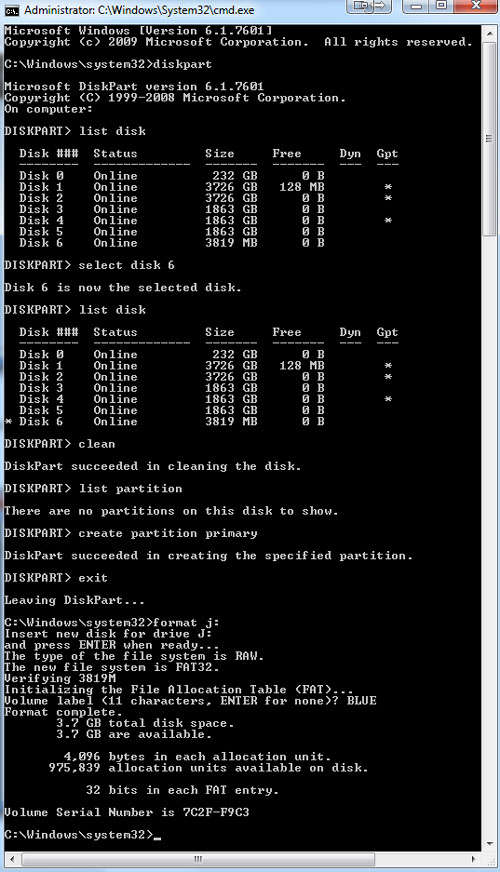
This is done using diskpart within the command prompt in Windows:
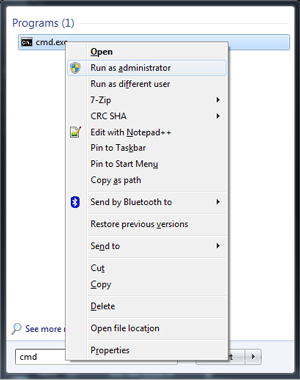
- Open an elevated command prompt (shift right click on CMD, "Run as Administrator")
- diskpart
- list disk
- Note the disk id number that corresponds to your USB drive.
- select disk [x] (where [x] is the id number noted from step 4)
- list partition (you can confirm that the correct disk is selected by the leading *)
- clean
- list partition
- create partition primary
- exit
- format j: (or whichever driver number is applicable)
- Enter a "Volume Label"
From the start menu type "cmd" in the search box and hold down the shift key before right-clicking on it. This will enable you to select "Run as administrator."
Once the command prompt is open the remaining steps are shown below:
To be sure which drive letter should be used in the format command, open Computer Management from Windows and select "Disk Management." From there you'll see a list of all disks currently recognized by the OS. In this case the USB drive was drive <J:>.

From Computer the recently reformatted drive is now ready for use.
![]()
Incorrect disk marked as "System Disk"
This process is also useful to delete an EFI protect partition from an internal hard drive that has been incorrectly marked as the "System Disk." I experienced this problem once when reformatting Windows while leaving multiple hard drives connected to the motherboard. When Windows reinstalled the software installed on the C: drive but marked a different drive as the "System Disk". This created issues on startup. I had to remove all drives but the one incorrectly marked as the "System Disk", reformat it using the command prompt (as shown above) and then proceed to reinstall Windows on the primary C: drive again, while it was the only drive connected to the computer.
Install Xbox Controller Receiver
I've had an Xbox 360 for years now, and beyond watching PLEX and playing some occasional Modern Warfare, the console wasn't getting much use, given the presence of my exceedingly more powerful gaming PC in the office. The snag that I ran into with the PC was when I 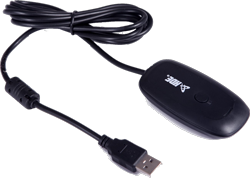 felt like the game I was playing would have been a much better experience if I'd had a controller in my hand, versus the mouse and keyboard (Rocket League anyone?). Microsoft tends to charge a mint for branded components so I decided to try one of the off brand Xbox 360 Wireless Controller Receivers found on Amazon.
The package contents came with the Receiver and a CD with some drivers for installation. Assuming Windows would find the driver automatically I plugged in the Receiver and was a bit surprised when the driver installation failed. I tried the CD software and got the same result.
Other users on Amazon had of course experienced the same issues and had posted some helpful instructions that got things running properly.
- Throw away the included CD
- Go to Microsoft's website for a driver download for "Xbox 360 Controller for Windows"
- Install said software
- Plug in the Receiver
- Open Device Manager
- Right-click on the "Unkown Device"
- Click on "Update Driver Software"
- Click on "Browse my computer for driver software"
- Click on "Let me pick form a list of device drivers on my computer"
- Highlight "Show All Devices"
- Click Next
- Select Microsoft as the manufacturer
- Under Model select "Xbox 360 Controller for Windows Version: 2.1.0.1349 [8/13/2009]"
- Click Next
- Click "Yes" on the Update Driver Warning
At this point everything should be installed properly and your controller should be able to connect to Windows and any video games should automatically recognize the presence of the controller onces it's turned on.

Download Hardware Drivers
Go to the manufacturer's website for your computer, or if you built the computer yourself, go to the website for each of the hardware component manufacturers. The critical drivers to look for are related to: chipset, LAN, audio, wireless, display, bios (in rare cases), bluetooth, synaptics (touchpad), to name a few. Once you've downloaded the drivers, save them to a flash drive so that you can easily load them up on your machine, once you've reformatted and reinstalled Windows.
Some of the more prevalent hardware manufacturers:
Download the Image for the Operating System
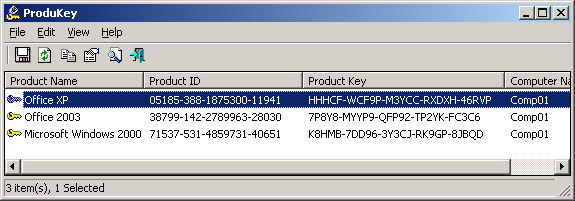
Before you actually begin reformatting, download the Operating System Image from Microsoft (you'll need your Product Key) and load it on to a 4GB flash drive using Microsoft's own tool. If you don't know where your product key is first look for a sticker on your machine and if that's fallen off then use NirSoft's ProduKey software to extract it from your computer. This software is also useful for recovering product keys for anything else installed on your machine (e.g. Microsoft Office).
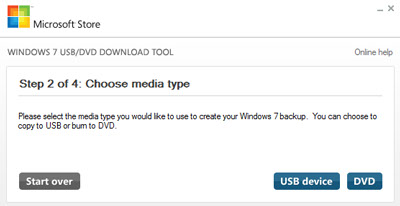
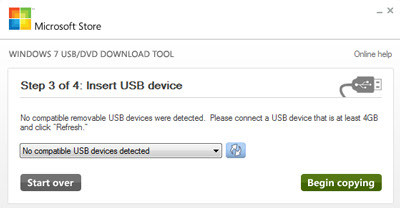
The Windows 7 USB/DVD Download Tool is simple to use and only involves 4 steps to get the image ready for use.
- Locate the image on your machine:

- Choose whether to install the image on to a USB drive or a DVD:
- Refresh and select the device and Begin Copying:
Reformat Windows
Once the image is loaded onto the media then reboot the computer and enter the BIOS Boot Settings. This will enable you to select the Drive where the installation image is found so that your computer knows where to look and begin the process to reformat. If using a flash drive, the drive may be listed under "hard drives" rather than "removable media."
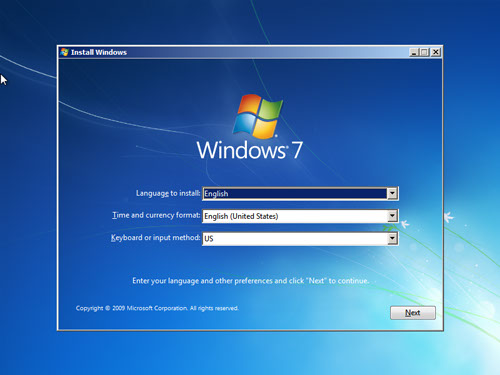
Once the appropriate boot device is select then windows may display a prompt for you to hit any key to boot from the device.
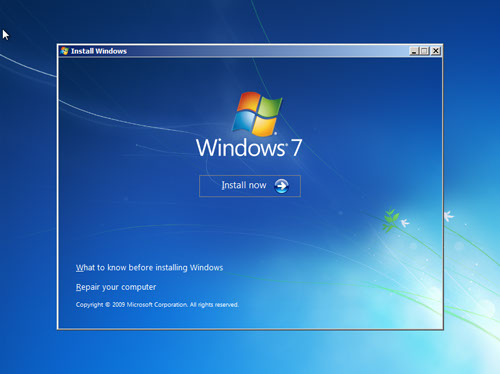
![]()
Click "Next."
Click Install now. It is worth nothing that this is the same screen you may use at other times when it's necessary to use the repair tools that are included on the Windows image (see "Repair your computer")
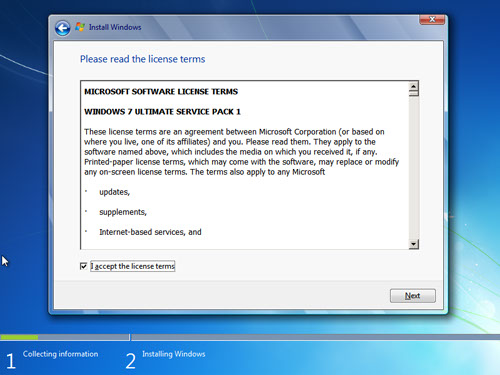
Accept the terms and click "Next."
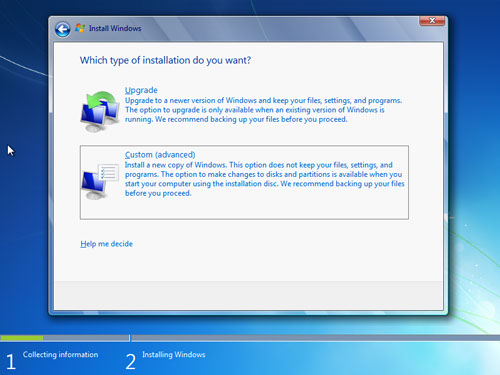
Choose "Curstom (advanced)" setup.
The partitions for your system drive are shown. Click "Drive options (advanced)."
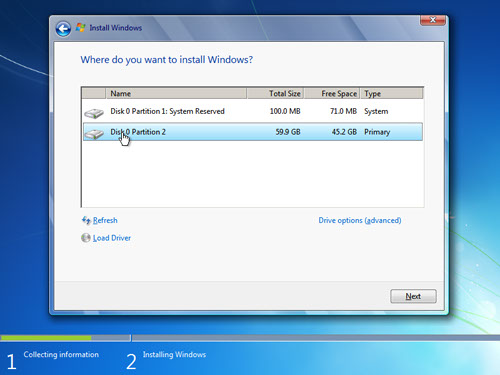
Highlight each partition and click "Delete" and then "OK."
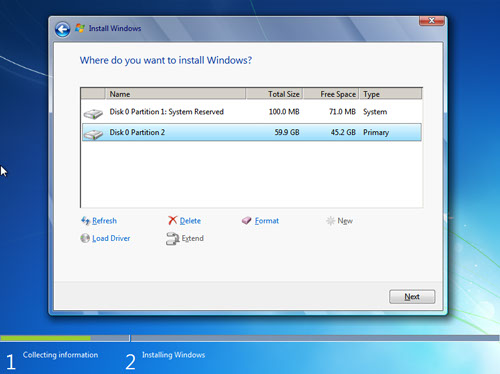

Click "Next."

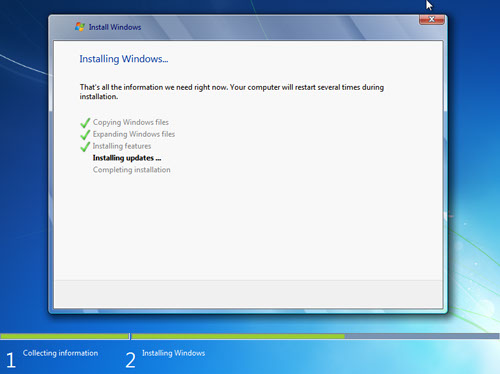
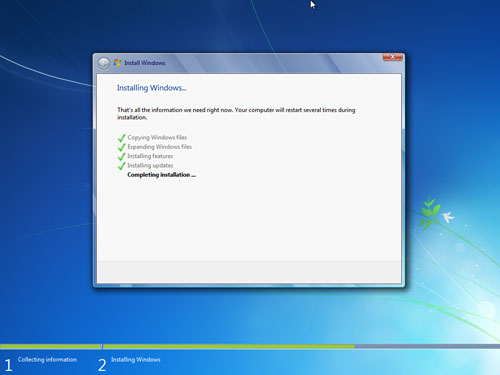
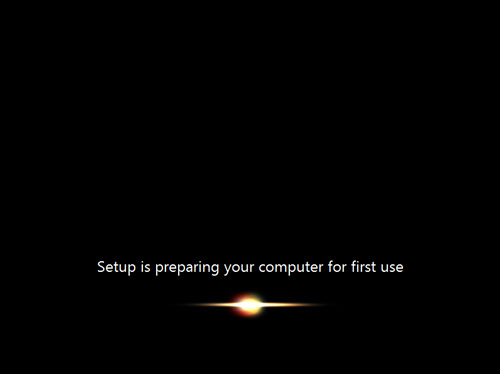
The installation will begin. Be patient.
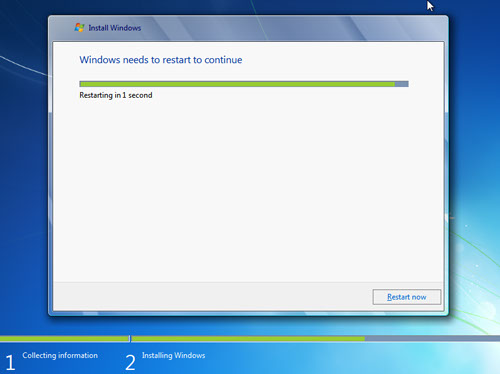
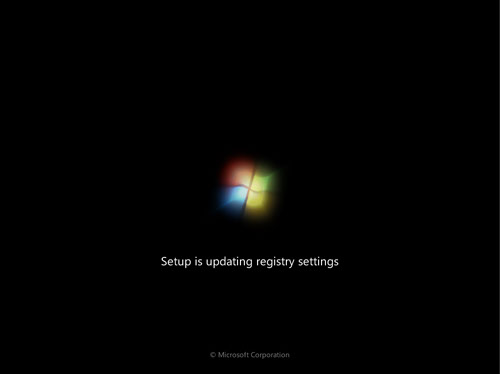
After the computer restarts on its own, all it to continue the installation without pressing any keys.
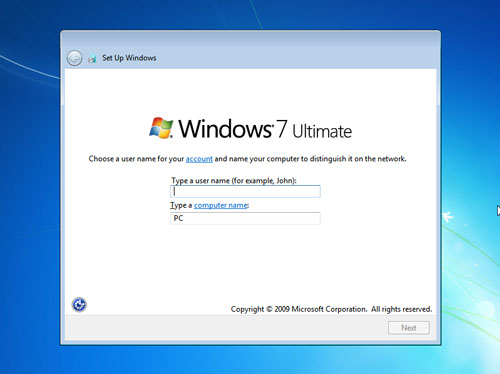
Create a user name and a computer name and click "Next."
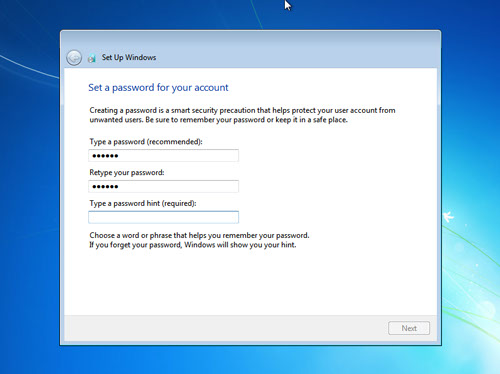
Create a password for logging in and click "Next."
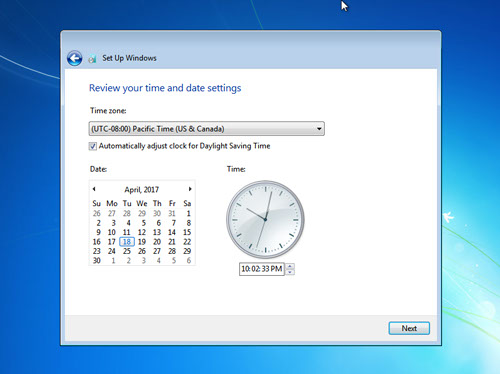
Select "Use recommended settings," then select your time zone and click "Next."

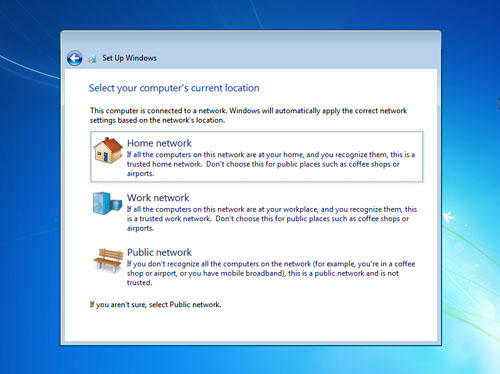
Select the appropriate network location based on where your currently connected.
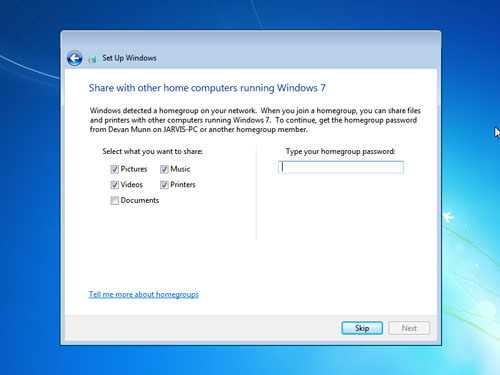
If a "homegroup" already exists on the network that you're connected to then enter the homegroup password here and click "Next," otherwise click "Skip."
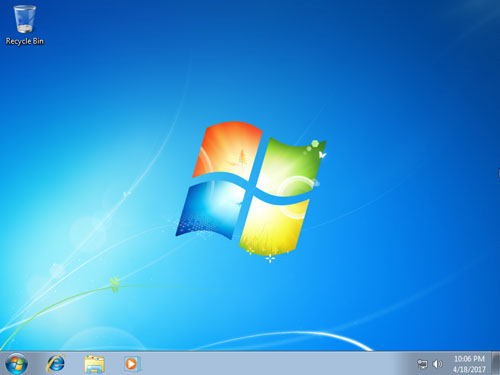
Done!
Teamviewer
![]() Teamviewer gives users the ability to remotely view and control computers and many different smart device. And the best part is that it's free for personal use. Unfortunately their systems erroneously detect "Commercial Use" sometimes. To fix this error requires manual tweaks since Teamviewer Support will no longer respond to free users. The video below provides a brief tutorial on the steps needed to remove the "Commercial Use Detected" warning that is generated by the software:
Teamviewer gives users the ability to remotely view and control computers and many different smart device. And the best part is that it's free for personal use. Unfortunately their systems erroneously detect "Commercial Use" sometimes. To fix this error requires manual tweaks since Teamviewer Support will no longer respond to free users. The video below provides a brief tutorial on the steps needed to remove the "Commercial Use Detected" warning that is generated by the software:
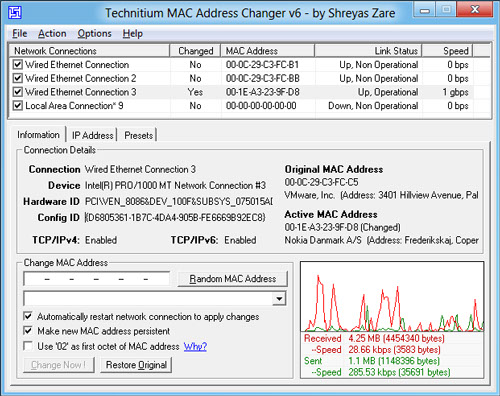
Technitium MAC Address Utility
Technitium MAC Address Changer allows you to change (spoof) the Media Access Control (MAC) Address of your Network Interface Card (NIC) instantly. It has a very simple user interface and provides ample information regarding each NIC in the machine. Every NIC has a MAC address hard coded in its circuit by the manufacturer. This hard coded MAC address is used by windows drivers to access Ethernet Network (LAN). This tool can set a new MAC address to your NIC, bypassing the original hard coded MAC address.